Photoinstrument 3.0 Build 309

Diposting oleh sidewalk.co | 08.01 | | 0 komentar »


WinApp | Photoinstrument 3.0 Build 309 | 2.74 Mb
 
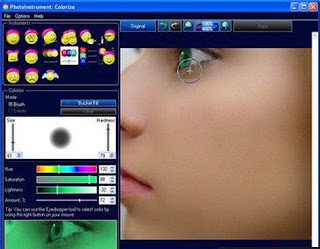
PhotoInstrument is a powerful and easy-to-learn raster graphics editor used to process digital photographs. With only a few clicks, anyone can solve most digital photo problems: Photo Editing; Photo Retouch; Draw MakeUp. Make your photo looks like its taken by professional photographer. If you ever wonder to touch up your photo, so you look more beautiful on your facebook or friendster or even on myspace, well this software is answer your question.
Current version includes these tools:
• Liquify
• Clone
• Smudge
• Skin Cleaner
• Glamour Skin
• Dodge / Burn
• Brush
• Blur
• Sharpen
• Colorize
• Rotate / Scale
• Red Eye Removal
• Brightness-Contrast
• Adjust Color Levels
• Glow
• Healing Brush
• Denoise
• Object Removal

Nikon Capture NX 2 2.2.3 Portable

Diposting oleh sidewalk.co | 07.51 | | 0 komentar »


 WinApp | Nikon Capture NX 2 2.2.3 Portable | 77.08 MB
 
 
Capture NX 2 easy-to-use software lets you make intuitive photo enhancements which are immediately visible on your monitor. Simply place the Control Point on the area that you want to edit and U Point Technology will analyze color elements such as hue, saturation and brightness, as well as recognize similar areas where an edit would best be applied.

This technology powers the entire Capture NX 2 series of Control Points: Color Control Points, the all-new Selection Control Points, White/Black/Neutral Control Points and Red-Eye Control Points. With Capture NX 2, there's no need to deal with selection tools, layers or lengthy training.


Main Features
Color Control Point:
Enhancements for hue, brightness and saturation are as simple as placing a Color Control Point on your image, then adjusting the length of the sliders. For example, Color Control Points are remarkably convenient for changing the color of flowers to better effect against green surrounding foliage.
lection Control Point:
This new function enables you to apply enhancements such as Unsharp Mask or D-Lighting to a specific area with just a click of the mouse. There is no need for precision selection or masks - the Selection Control Point recognizes the areas you want to modify. The enhancement effect can easily be adjusted, allowing you to apply your chosen effect as you would with intuitive masking.


Artworks by Michal Ivan

Diposting oleh sidewalk.co | 13.43 | | 0 komentar »


85 JPG | ~700x1300 pix | 35.3 Mb | Eb-Rs


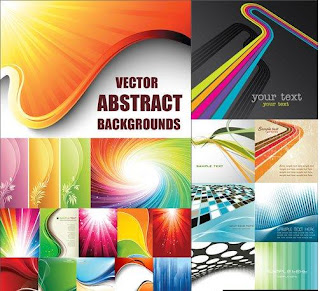
Abstract Backgrounds

Diposting oleh sidewalk.co | 13.36 | | 0 komentar »


20 EPS + JPG Preview | 12 mb


Icon and logo Collection pack 1

Diposting oleh sidewalk.co | 13.30 | | 0 komentar »


20 EPS + JPG Preview | 10 mb


TuneUp Utilities 2010

Diposting oleh sidewalk.co | 15.21 | | 0 komentar »


TuneUp Utilities 2010 : a Fresh New Version of the Acclaimed Optimization and Customization Suite For PC

Posted using ShareThis

Brothersoft Weekly Newsletter 2009-11-15

Diposting oleh sidewalk.co | 15.18 | | 0 komentar »


Brothersoft Weekly Newsletter 2009-11-15

Posted using ShareThis

BrotherSoft Daily Games - 11.20

Diposting oleh sidewalk.co | 14.04 | | 0 komentar »

BrotherSoft Daily Games - 11.20

Posted using ShareThis

Create Text Effect : Tutorial

Diposting oleh sidewalk.co | 23.39 | | 0 komentar »

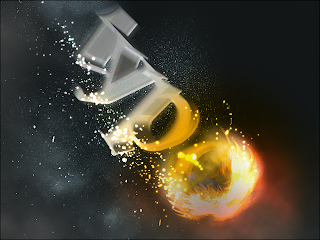
Spectacular Flaming Meteor Effect.


In previous tutorials you've seen two smoke effects that I've created, but let's face it, you can't have smoke without a fire somewhere. So in this tutorial, I will show you how to create a fire effect similar to when a spaceship or comet enters the earth's atmosphere. The image we'll be creating is inspired by a Nike Ad I saw some time ago. I'm not sure what the URL is. If anyone knows it, please link us up in the comments.
It's always a good idea to keep your eyes open for inspiration for effects and designs no matter what you are doing. Graphics are everywhere and you can learn a lot by looking at what other people do. Now on to the tutorial!


Amazing Photoshop light effect in 10 Steps


When I added a “buy me a coffee” featured on my blog I decided to use an image I had done when I was showing my cousin how to do the Magic effect. Instead of using a hat I used a coffee cup and the process is basically the same, however this time I will explain it in more details.


Transparent Glass Lettering in Photoshop.

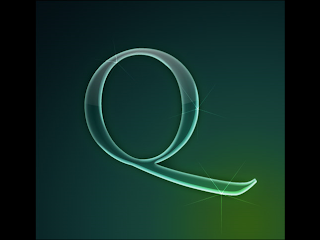
In this tutorial, we're going to use some super layer effects and a bit of extra magic to make a lettering style that looks transparent and stunning. Because there is so much use of layer styles, you need to download the sample PSD from the link at the bottom of the tutorial in order to follow along.

Step 1:

BACKGROUND LAYER
To begin this tutorial, we'll first give ourselves a nice background gradient. Now while most gradients are two-color, in Photoshop you can actually make much more complex gradients by clicking on the Gradient icon in the top left. You'll get a panel showing the gradient and you can add more colors to it. In this case, I've used three colors to make a gradual change from green to a set of blues.
Multi-color gradients can make for a stunning background. I've used a Radial Gradient and centered it to the bottom right.


Spectacular Grass Text Effect in Photoshop.


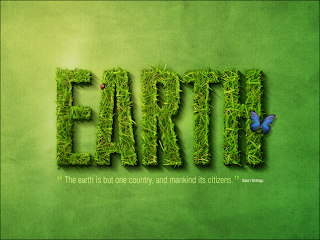
Ever wanted to make text out of grass? Well with Photoshop you can. In this tutorial we'll create a rather cool-looking grass-text effect using a photo of grass, the Pen Tool and a bit of patience.
This is the first of a five-part set of tutorials where we'll use Photoshop to make text out of all sorts of things. So let's get ready to Photoshop!
Step 1: Background
This tutorial is made up of three parts—the background, the text itself, and some final extra effects. So first of all we're going to make a background. To do this we create a new document in Photoshop. I made mine 1920 x 1200 because I want this image to sit on my laptop background.
We start by drawing a Radial Gradient with the Gradient Tool (G) going from a light yellow-green (#adbf41) to a mid-range green (#328a26). I wonder if I've ever written a tutorial that doesn't start with a radial gradient. :-)


Create Hellicous Fire: Tutorial

Diposting oleh sidewalk.co | 23.01 | | 0 komentar »

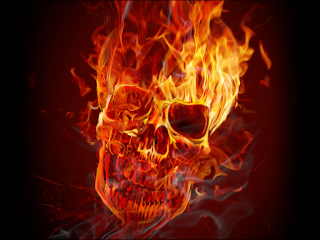
In this tutorial, we'll go through all the steps of creating a flaming skull in Photoshop. We'll be using some images we shot ourself of flames, and a stock Designious vector skull to get us started. This tutorial covers some relatively simple steps and some clever photo manipulation techniques. Let's get to it!

For this tutorial, I used Photoshop CS3, a skull from Designious.com (you could choose to use a free skull though, such as Skull Vector Pack 1) and some hi-res flames images. The high-res image files are available to Psd Plus members in the download pack. Though non-members are certainly welcome to shoot your own flame photos or find some stock to use here, so you can follow along.
To get things started, create a new document 210mm by 290mm with a 100% black background.